Passthrough features guide
Run Clay tables without rows.
Overview
Note: This is an feature available to enterprise customers only
Passthrough tables in Clay are a powerful feature designed to help you process and enrich large volumes of data efficiently.
They allow you to bypass the standard row limit by automatically processing incoming data, enriching it, and then forwarding it to a designated destination before deleting the original entries from the table.
This ensures your tables remain manageable while continuously handling new data.
Note that passthrough features don't apply to CSVs, including bulk uploads at high volumes.
How Passthrough tables work
When enabled, passthrough tables operate on data added via webhooks. Following is a step-by-step process of passthrough tables.
- Data Ingestion: New rows are added to a Clay table through webhooks.
- Enrichment: Clay runs all configured enrichments and operations on the new data.
- Review Interval: Clay reviews the table to identify rows ready for passthrough after a 60-second interval
- Criteria for Passthrough: Rows that meet the following conditions are selected:
- The total number of rows in the table exceeds a specified threshold of 5,000 rows. If you need to raise the threshold please contact support.
- All enrichment processes have been completed for those rows.
- Criteria for Passthrough: Rows that meet the following conditions are selected:
- Data Transfer: Selected rows are automatically transmitted to your designated destination (e.g., Snowflake, HubSpot, Google Sheets) via an API integration.
- Deletion: Once the data transfer is confirmed successful, the original rows are deleted from the Clay table.
How to enable Passthrough tables
Passthrough tables can be enabled via the admin panel. Follow these steps to set them up.
Step 0: Open your table with webhooks as the source
- Ensure that the table you want to configure has webhooks set as its data source. Passthrough features only work with tables where the sources is webhooks.
Step 1: Access the admin panel
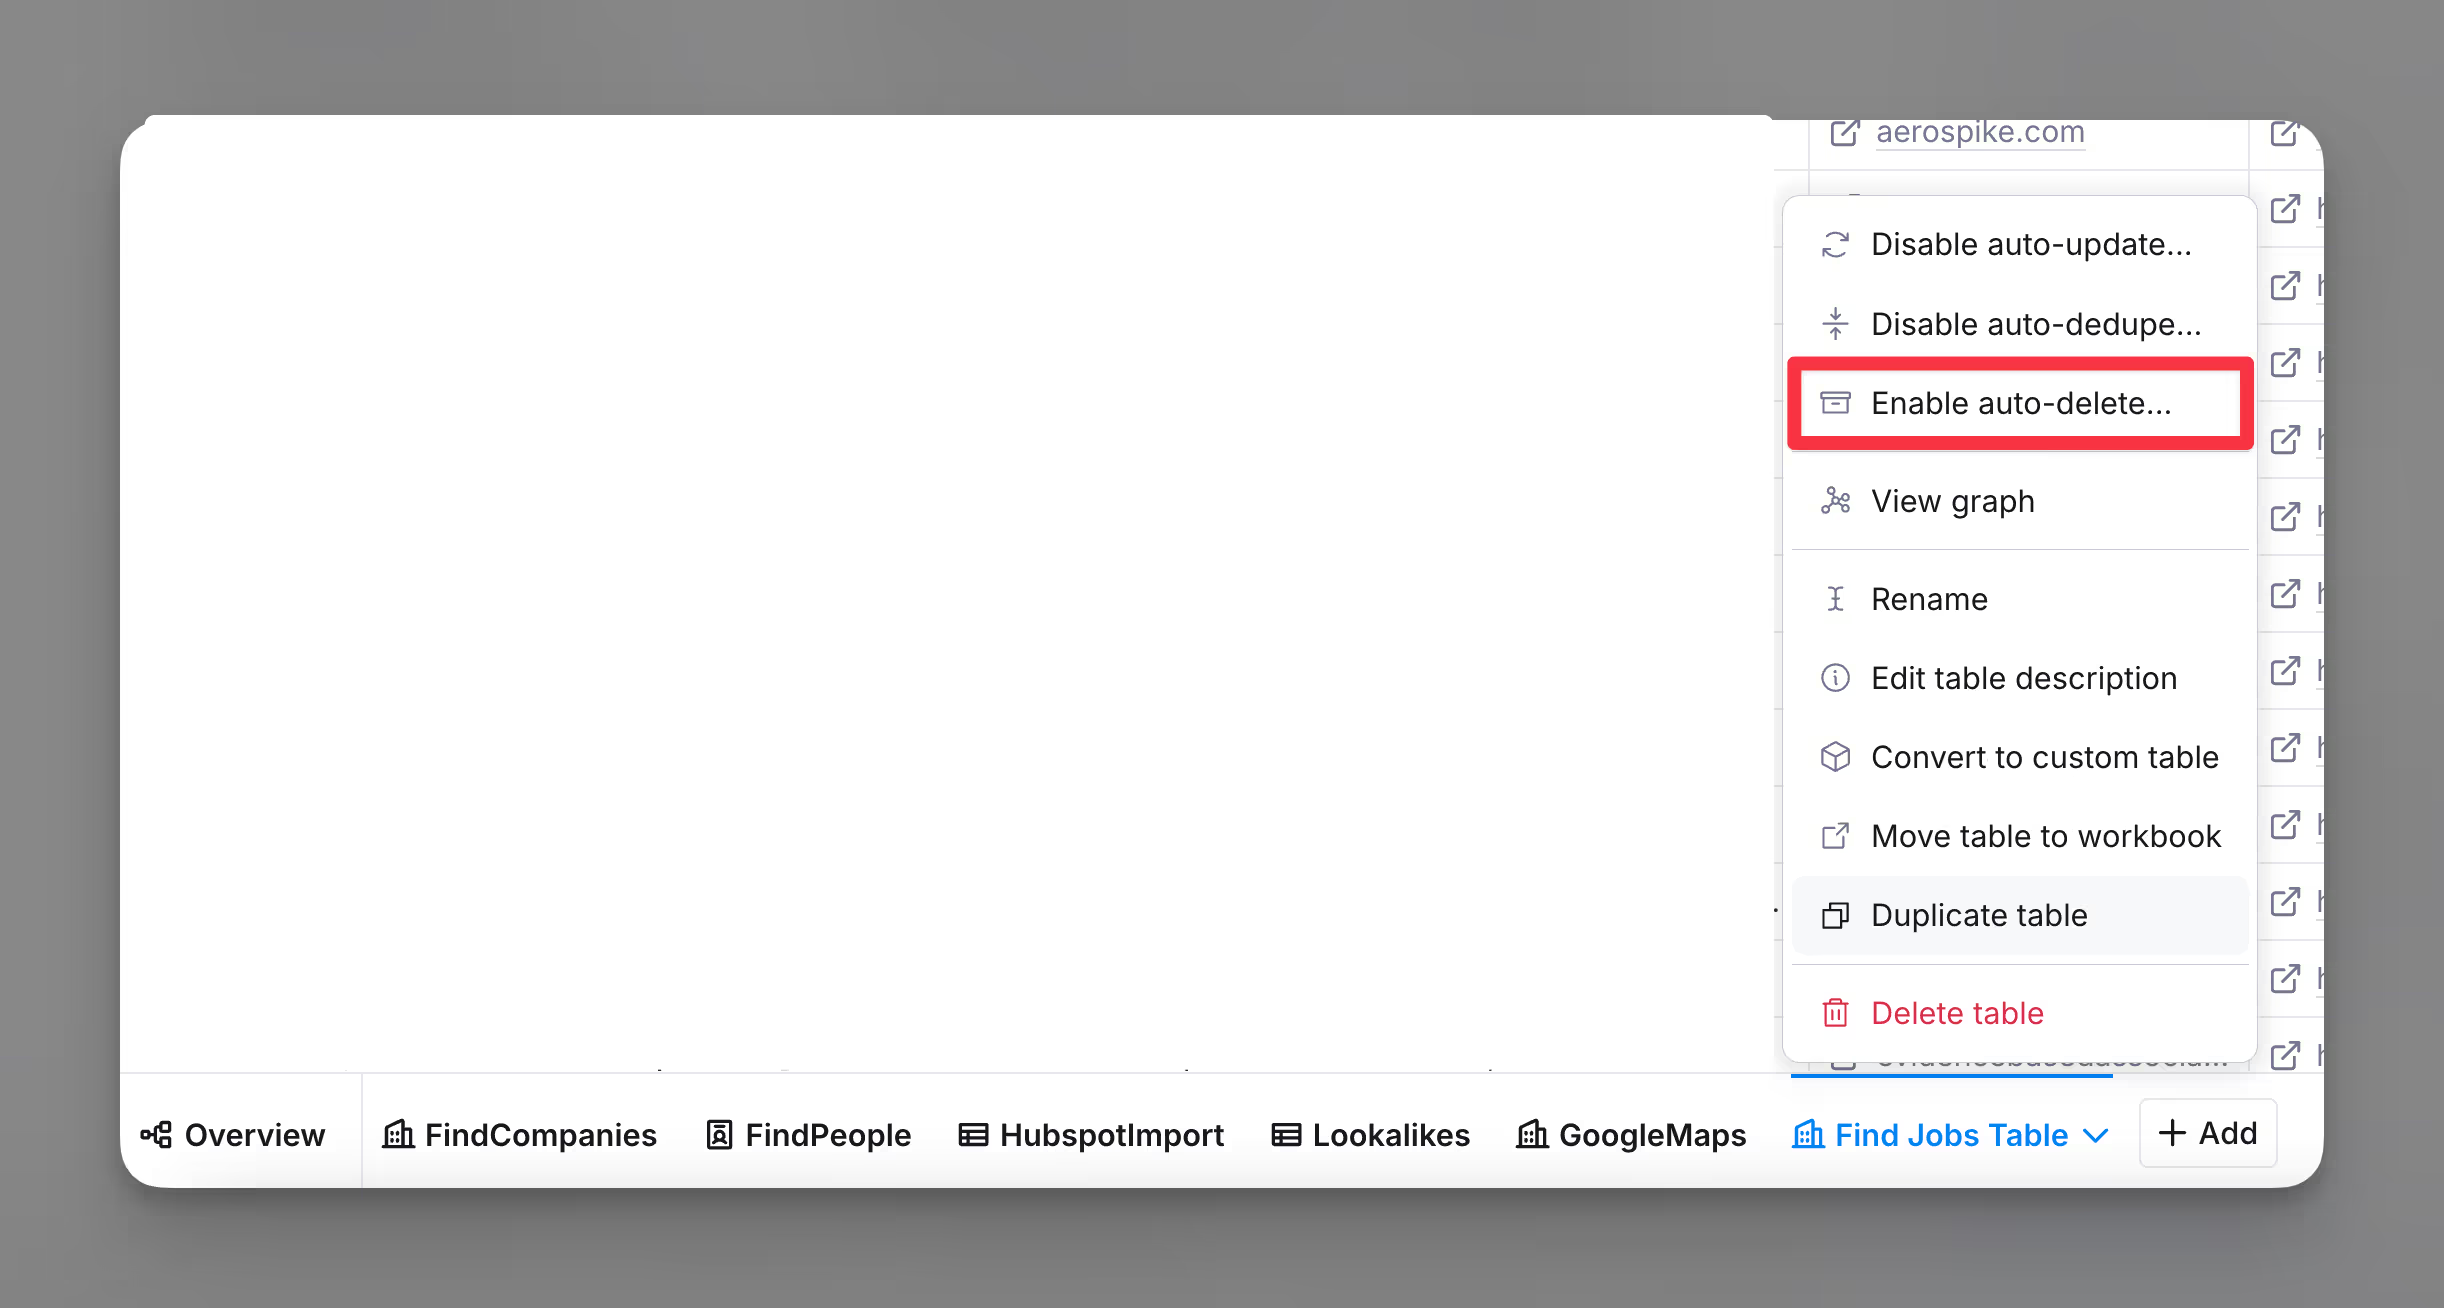
- Navigate to the bottom navigation panel) and select Enable auto-delete.

Step 2: Enable automatic row deletion
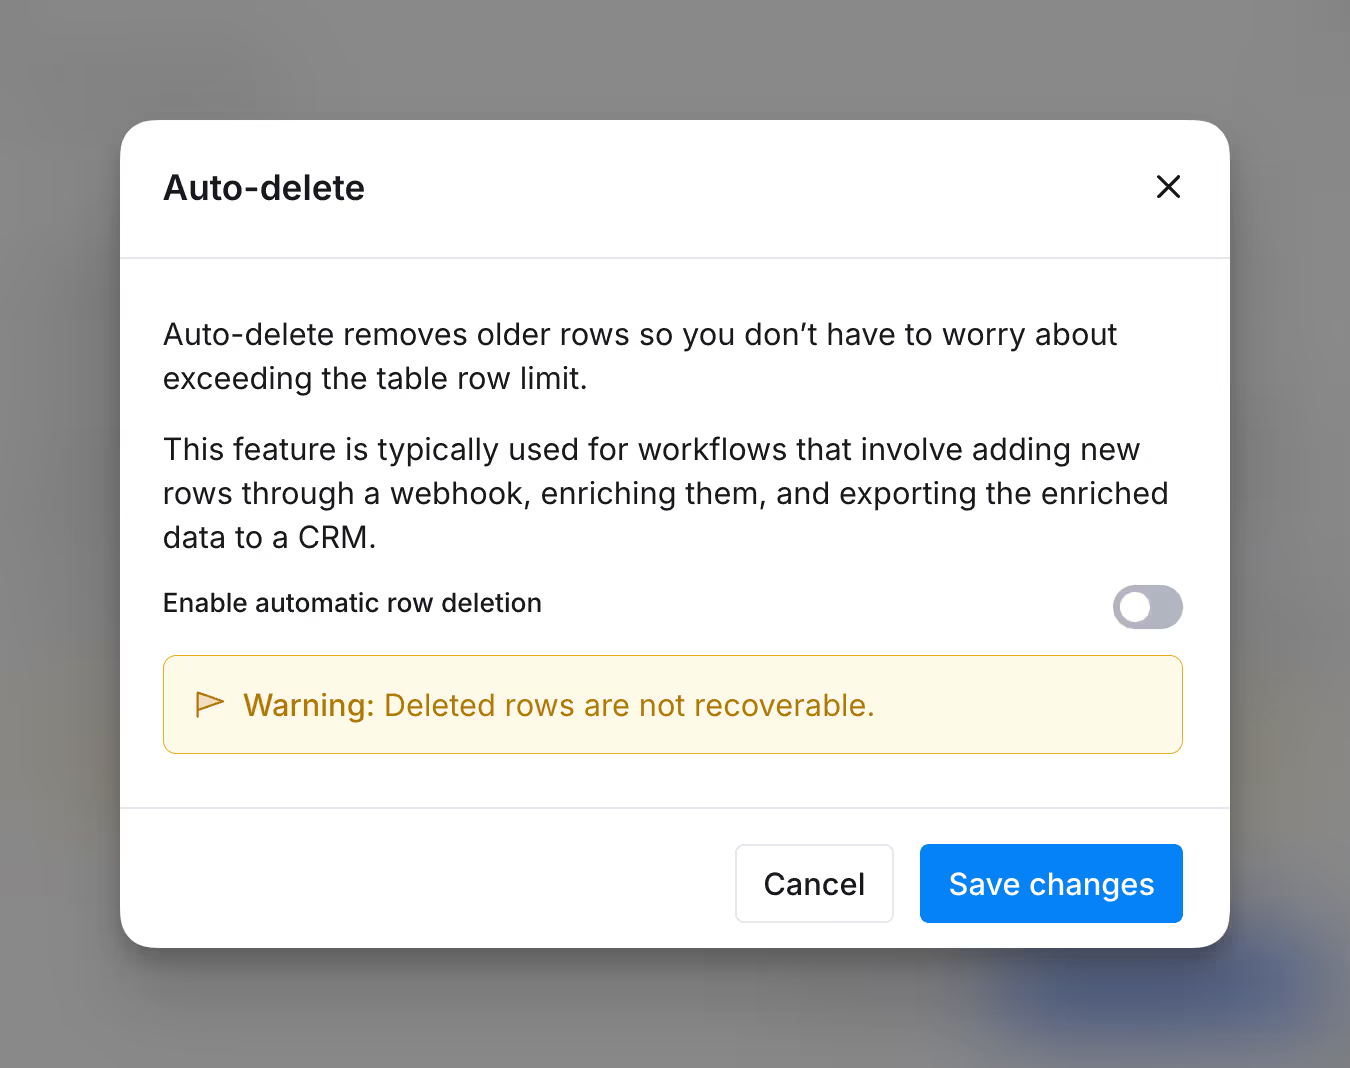
- Within the Auto-delete settings, Enable Automatic Row Deletion.
- This action activates the passthrough functionality by ensuring that rows are automatically deleted after processing and transferring.

