Use AI integration overview
Leverage AI to process, categorize, and conduct web research for actionable insights.
Getting started with Use AI
The Use AI feature in Clay allows users to automate various tasks using AI models for content creation, data enrichment, and web research. These AI capabilities are powered by an AI model, which can be either GPT, Claude, or Gemini.
You can do many things with the Use AI integration including:
- Drafting personalized messages from company and individual data
- Finding financial information of 10-K reports online to track business metrics
- Researching a company’s current customer list based off their website
We’ll first cover how to connect Clay to Use AI. Then we’ll go over step-by-step instructions on how to use the Use AI integration.
Connecting Use AI to specific AI models
The AI integration in Clay is powered by GPT, Claude, or Gemini models.
You have the flexibility to access these models through either the Clay-managed account or your own API key for specific models.
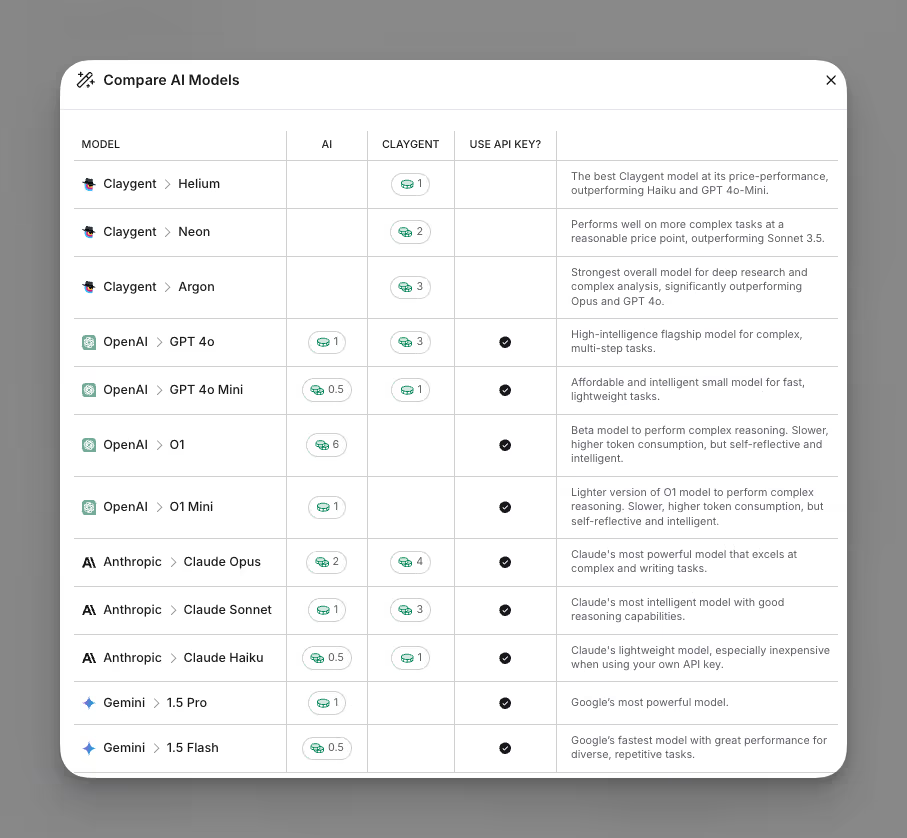
The Use AI integration will default to use the Clay-managed account, but you can also select other accounts as the default when you create an account. While it’s not necessary to have a GPT, Claude, or Gemini API key to use the AI features, using the Clay-managed account will involve credit charges, anywhere from 0.5 to 6 credits.
To help you illustrate the costs of the model for each output and the API key compatibility, below is a chart for all the models currently available:
Option 1: Use the Clay-managed GPT, Claude, or Gemini accounts
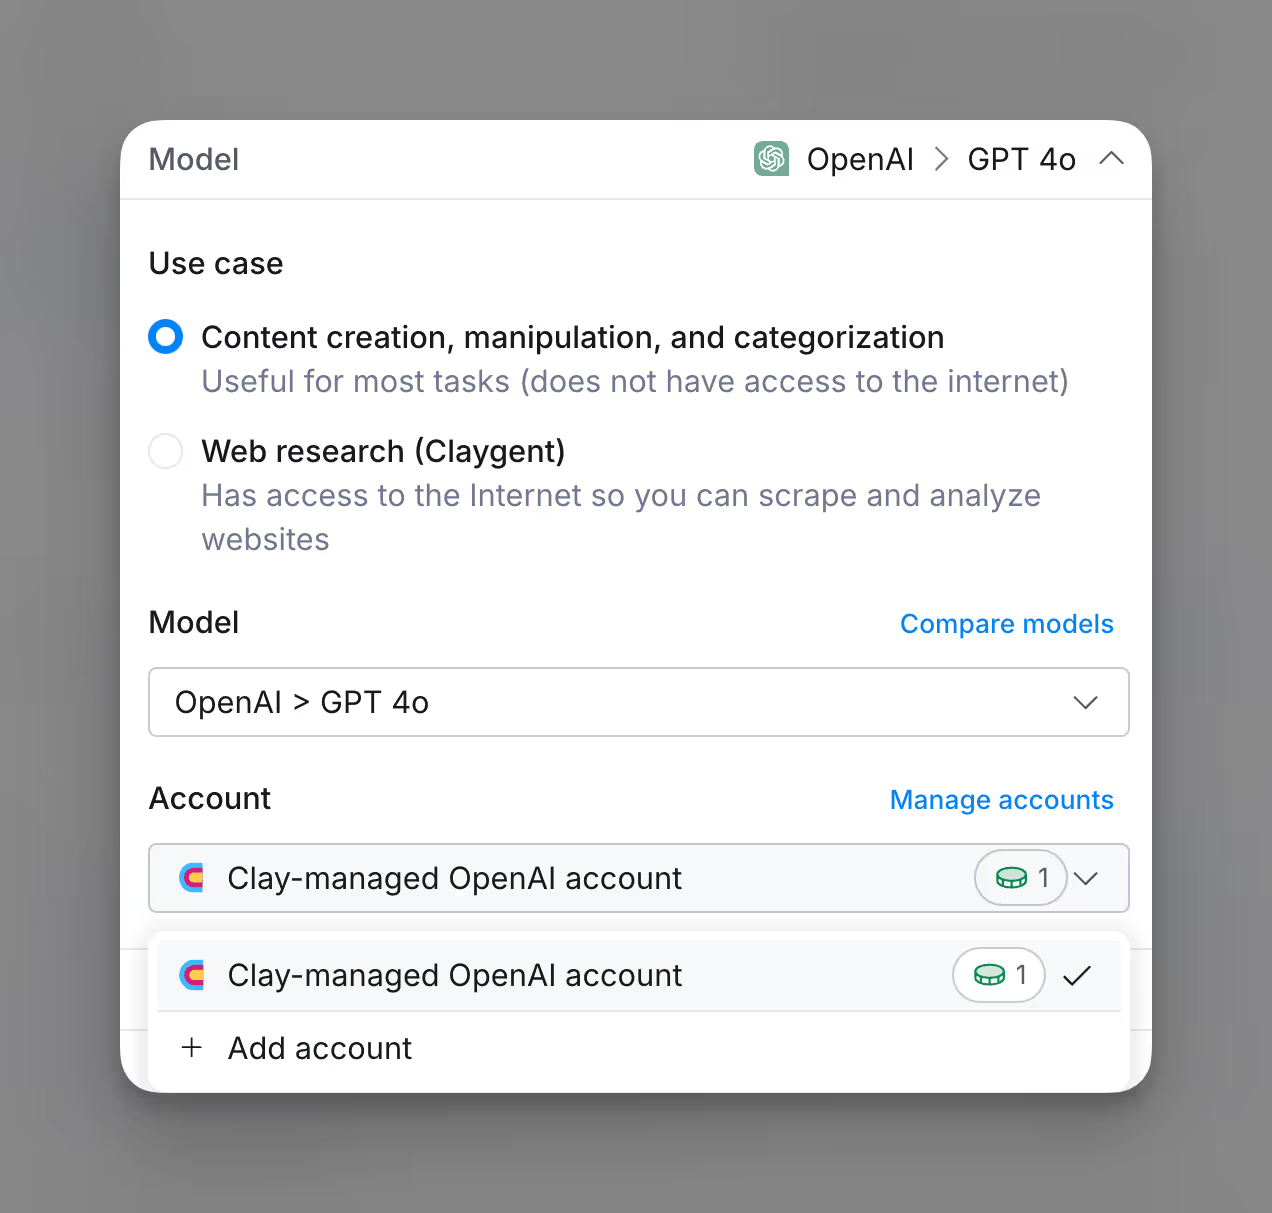
The Clay-managed account is accessible for all models. If you are not on the Clay-managed account, you can access this account for your particular model within the enrichment panel through Model > Account
Option 2: Use your own API Key
If you are on a paid plan, you are also able to bring your own API key for models besides Claygent.
To obtain an OpenAI API key, you can create an API key in your OpenAI API Key Page.
You can add your own API key for Use AI, head over to Model > Account > Add Account

Step-by Step Guide on Use AI Integration
There are many parts to using the Use AI integration, but we’ll break it down in this section with a interactive tutorial and written guide.
Below is an interactive tutorial on using Claygent.
Here, we’ll go over a step-by-step tutorial on all the important parts of this integration.
Step 1 (Optional): Start with an integration template
Templates offer a quick way to get started by providing pre-configured setups for common use cases.
Click the Browse Templates button located at the top of the integration window. This will bring up a selection of available templates for different types of tasks.
Step 2: Select use case
The two primary options are:
- Content Creation, Manipulation, and Categorization: This use case is ideal for tasks like generating content or organizing data, without needing internet access.
- Web Research (Claygent): If you need the AI to perform web scraping or gather data from online sources, choose this option. Claygent will have internet access.
Step 3: Select model for action
Select the model for your AI tool to use. Each model offers unique strengths and behaves slightly differently in terms of how it processes prompts. It’s a good idea to try each one and see which best suits your Clay workflow.
If you’re unsure which model to select, click the Compare Models link to get more information on how each model differs. This will give you insight into their respective strengths, helping you choose the best fit for your use case.

For more detailed information on each model’s features and prompting techniques, you can refer to the official documentation from the respective providers:
Step 4: Select account to access model API key
Select the account that will be used to access the model’s API. By default, the system selects the Clay-managed key, but you have the option to provide your own API key for more control over usage and costs.
If you have obtained your own API key (from OpenAI, Anthropic, or another provider), you can enter it here.
To add your own key:
- Click on Manage Accounts next to the account field
- Follow the prompts to input your API key and link your provider account.
Step 5: Define prompt
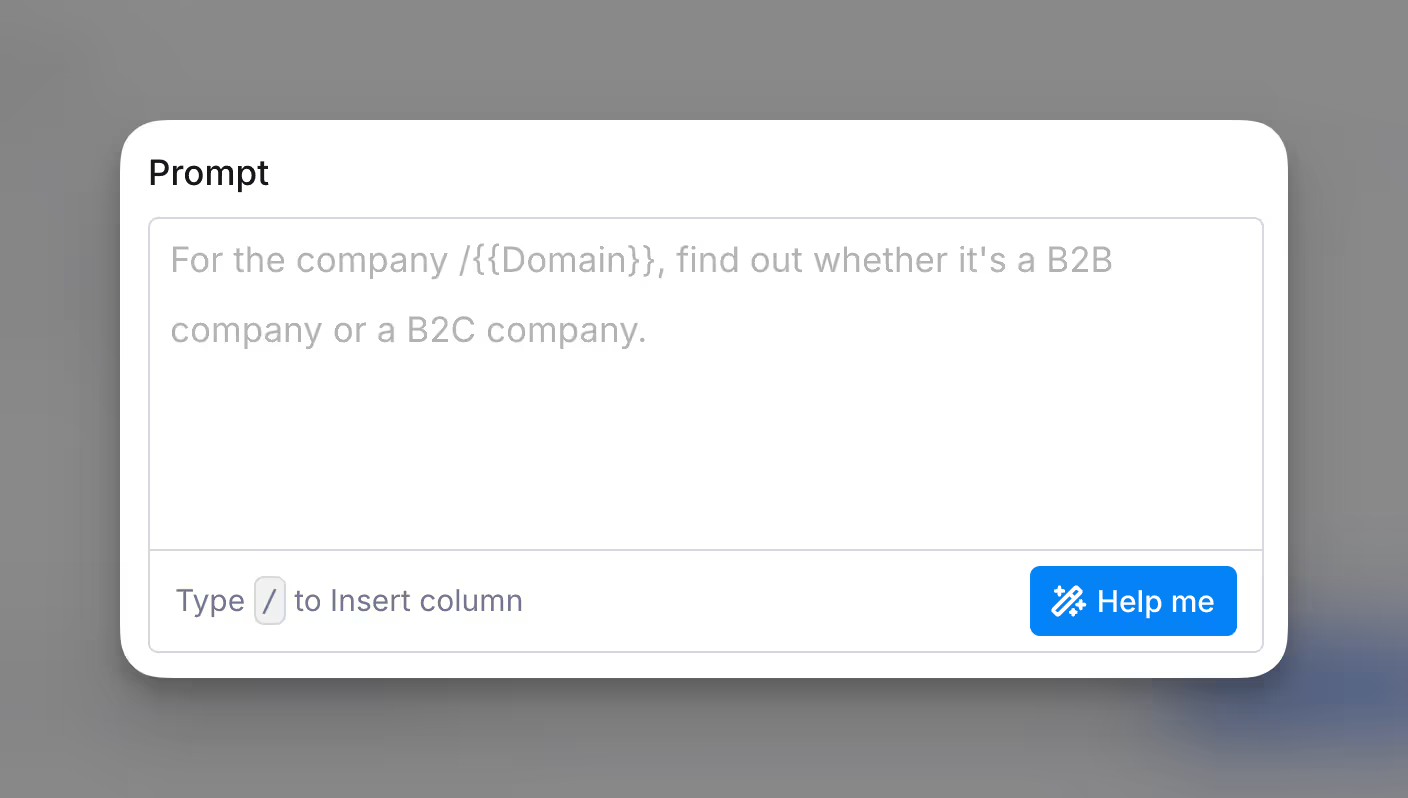
You have the flexibility to either write your own prompt manually or use the Help me feature to generate a prompt automatically.
In the Prompt field, enter a clear instruction for the AI. You can use dynamic variables with / to personalize the prompt for different inputs. Good prompts include specific instructions.
If you’re unsure how to frame your prompt or need assistance, click the Help me button next to the prompt field.
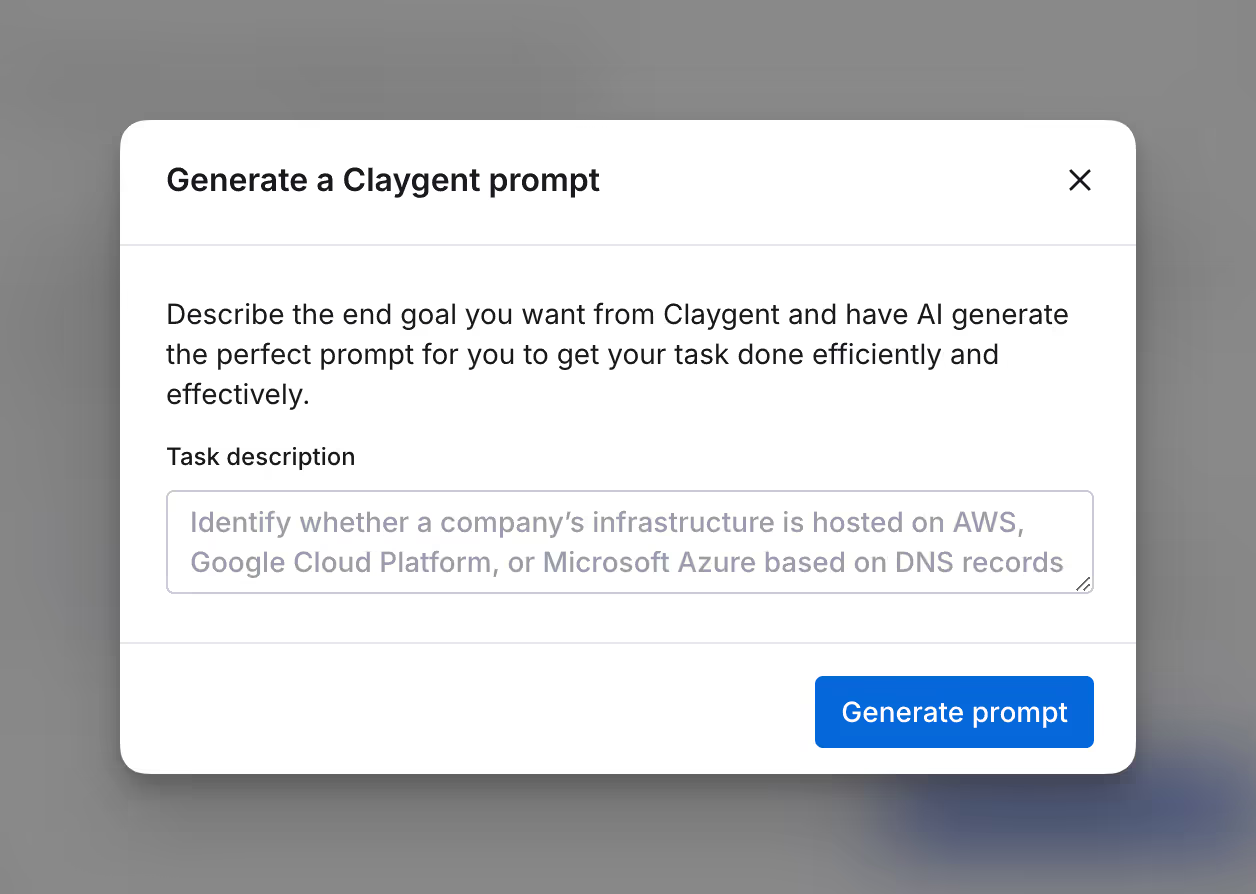
A new window will appear where you can describe your task in plain language under Task Description. This is where you can explain the end goal you’re aiming for.
After describing your task, click Generate Prompt. The AI will generate a customized prompt based on your description, which you can then use or further refine.
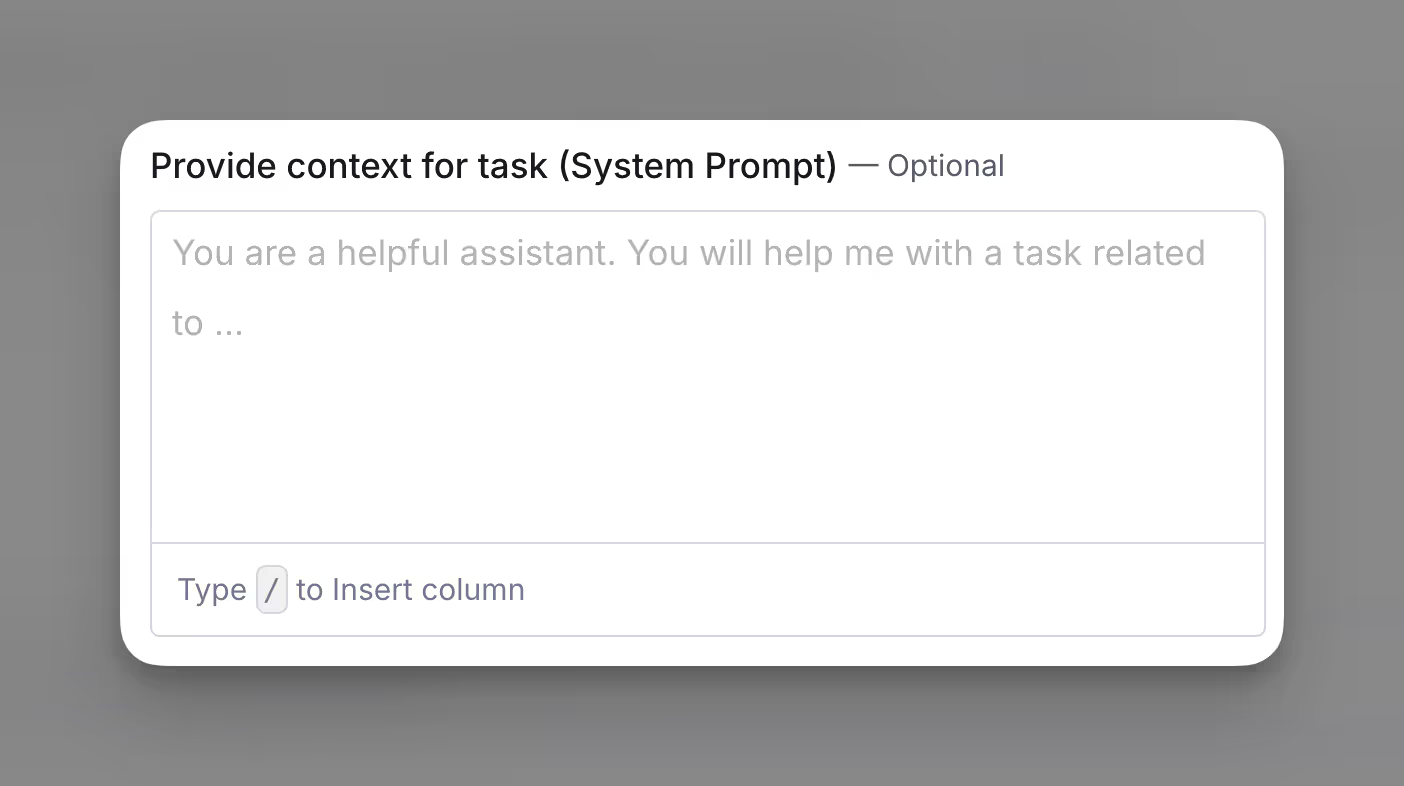
Step 6 (Optional): Define system prompt
The System Prompt sets the overall behavior of the AI for the entire task. It’s optional but can help guide the AI to respond in a specific tone or role.
In the System Prompt field, describe the AI’s role and how it should approach the task.
Step 7 (Optional): Determine if output should return as a JSON object
If enabled, the output will be returned as a JSON object. This is useful if you need structured data to export.

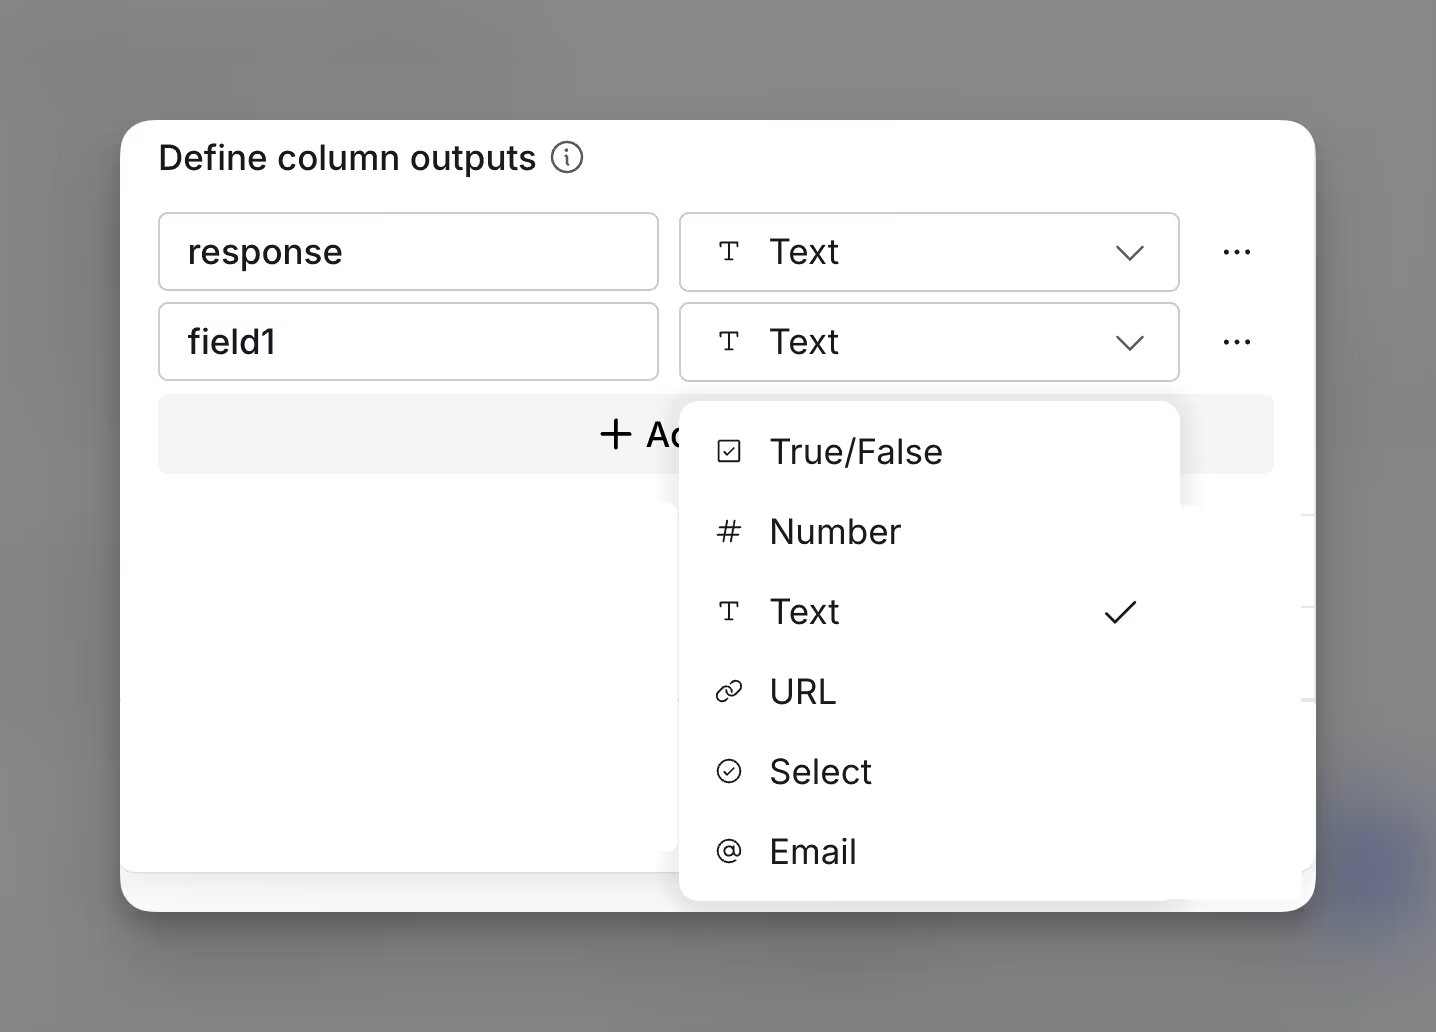
Step 8: Define column outputs
Specify the fields where you want the AI’s response to be mapped. Each output can be returned in a specific format, helping you integrate the data effectively into your workflow.
You are able to define outputs as the following data types: True/False, Number, Text, URL, Select, Email.
By default, the field will return a response as Text unless another data type is specified.
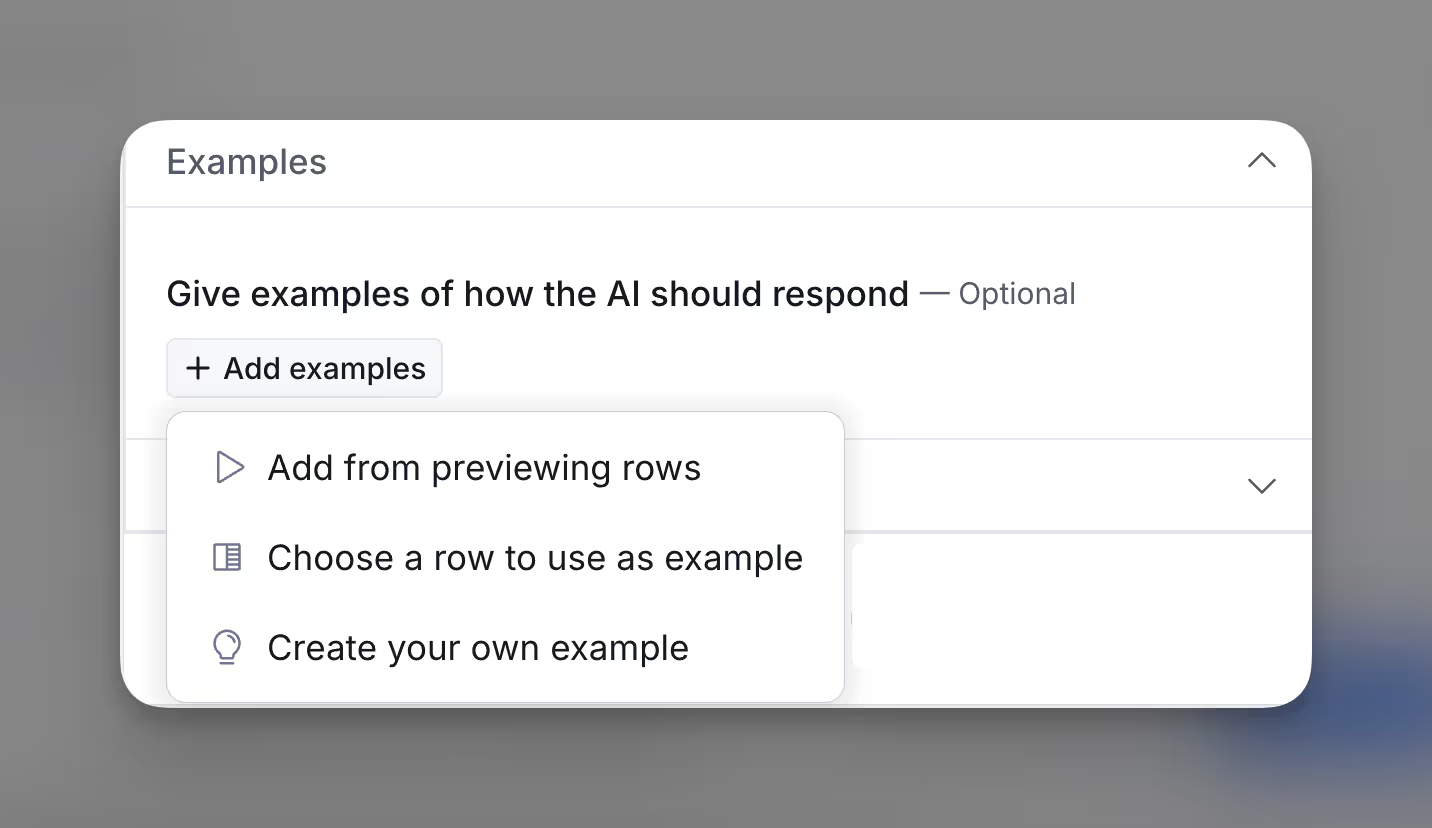
Step 9 (Optional): Provide examples for output response
This is only applicable to use cases without internet access (Content creation, manipulation, and categorization)
This optional step allows you to provide sample responses, guiding the AI on how it should format or structure its output. This can help improve the accuracy and relevance of the AI’s responses, especially for more complex tasks.
For more explanations on this technique, please refer to few-shot prompting.
Step 10 (Optional): Configure run settings
The Run Settings control how and when the AI runs.
Auto-update will automatically enrich new rows if they are added.
The Only run if allows you to set conditions to control when the AI runs. For example, you can make the AI run only if specific data fields are filled.


